Article by: Joe Nidd Astrophotographer
Naseby in Central Otago is now officially recognised as a Dark Sky Community, the first in New Zealand, placing it on the global map as a leader in night sky conservation.
This makes Naseby the perfect location to try your hand at astrophotography. Here is a 5 point guide on how to achieve your own spectacular images.
1. Choose the Right Equipment
Start with a DSLR or mirrorless camera and a sturdy tripod. A wide-angle lens with a large aperture (f/2.8 or lower) is ideal for capturing more light from the night sky. Try using a shutter delay to avoid any camera shake when you press the shutter release button
2. Find a Dark Location
Light pollution can wash out stars and celestial objects. Seek out dark-sky locations away from city lights with an interesting foreground composition. Naseby and the beautiful Maniototo region are perfect for this!
3. Learn Basic Camera Settings
Set your camera to manual mode. Use a high ISO (1600–3200), a wide aperture, and a long exposure time (15–30 seconds) to capture faint stars. Focus manually and experiment with settings to find the best balance between brightness and noise. Exposing too long will result in star trails so experiment to see where the limit is for your setup.
4. Plan Your Shoot
Check the Naseby weather forecast and moon phase. Clear, moonless nights are best. Use astronomy apps to track the position of stars, planets, and the Milky Way. Arrive early to set up and allow your eyes to adjust to the darkness. Pack warm layers for cold winter nights and a head torch with a red light to preserve night vision.
5. Edit and Share your Photos
Post-processing is essential in astrophotography. Use photo editing software to bring out the subtle details in your images. Share your results and don’t forget to mention Naseby’s dark skies!
Related Stories
-

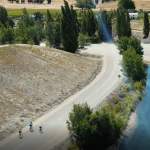
Finding Balance – A Community Connected by Trails
Read more about Finding Balance – A Community Connected by Trails -
Responsible Camping in Central Otago
Read more about Responsible Camping in Central Otago -
Romantic Rides
Pick up your partner, significant other, or best mate and sample one of Central Otago’s fabulous trails this Valentine’s Day.
Read more about Romantic Rides -
Challenge Yourself
The festive season is in full swing and if you’re keen for to burn off those mince pies and mulled wine, we have just the answer (or 2!).
Read more about Challenge Yourself -
Cruisin the Clutha
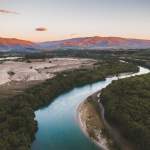
Central Otago’s mighty Clutha River is one of New Zealand’s most mesmerising natural features. Its stunning scenery, gold-rush history and swift turquoise waters make it a must-explore on any journey through ‘Central’.
Read more about Cruisin the Clutha